The forum pages are fully operational! See this link for the latest forum topics, where users can collaborate or discuss certain topics in one place!
Difference between revisions of "Molly MacDonald/Gallery"
Tags: apiedit visualeditor |
Tag: rte-wysiwyg |
||
| Line 1: | Line 1: | ||
{{GalleryHeader}} | {{GalleryHeader}} | ||
==Promotional Image== | ==Promotional Image== | ||
<gallery widths="180"> | <gallery widths="180" position="center" spacing="small"> | ||
Promo Molly MacDonald.png | Promo Molly MacDonald.png | ||
</gallery> | </gallery> | ||
==From Books== | ==From Books== | ||
<gallery> | <gallery position="center" spacing="small"> | ||
Arthur, It's Only Rock 'n' Roll book - the big concert.jpg|Molly in the concert in ''[[Arthur, It's Only Rock 'n' Roll (book)|Arthur, It's Only Rock 'n' Roll]]'' | Arthur, It's Only Rock 'n' Roll book - the big concert.jpg|Molly in the concert in ''[[Arthur, It's Only Rock 'n' Roll (book)|Arthur, It's Only Rock 'n' Roll]]'' | ||
</gallery> | </gallery> | ||
==Character Modelsheet and Storyboard== | ==Character Modelsheet and Storyboard== | ||
<gallery | <gallery position="center" spacing="small"> | ||
Molly Modelsheet.JPG | Molly Modelsheet.JPG | ||
</gallery> | </gallery> | ||
==Screenshots== | ==Screenshots== | ||
===Alternate Apparel=== | ===Alternate Apparel=== | ||
<gallery widths="180"> | <gallery widths="180" position="center" spacing="small"> | ||
S01E17a molly's street hockey outfit.jpg|Molly in her street hockey outfit. | S01E17a molly's street hockey outfit.jpg|Molly in her street hockey outfit. | ||
S03E05b Molly potato chip.jpg|Molly as a potato chip in "[[Revenge of the Chip]]". | S03E05b Molly potato chip.jpg|Molly as a potato chip in "[[Revenge of the Chip]]". | ||
| Line 41: | Line 41: | ||
==== [[D.W. All Wet]] ==== | ==== [[D.W. All Wet]] ==== | ||
<gallery> | <gallery position="center" spacing="small"> | ||
D.W. All Wet - Molly & Fletcher.jpg | D.W. All Wet - Molly & Fletcher.jpg | ||
</gallery> | </gallery> | ||
==== [[Arthur Accused!]] ==== | ==== [[Arthur Accused!]] ==== | ||
<gallery> | <gallery position="center" spacing="small"> | ||
Arthur Accused - Molly 1.jpg | Arthur Accused - Molly 1.jpg | ||
Arthur Accused - Molly 2.jpg | Arthur Accused - Molly 2.jpg | ||
| Line 52: | Line 52: | ||
==== [[Arthur Goes to Camp]] ==== | ==== [[Arthur Goes to Camp]] ==== | ||
<gallery> | <gallery position="center" spacing="small"> | ||
Arthur Goes to Camp - Tough Customers.jpg | Arthur Goes to Camp - Tough Customers.jpg | ||
Arthur Goes to Camp 28.jpg | Arthur Goes to Camp 28.jpg | ||
| Line 58: | Line 58: | ||
==== [[Arthur's Baby]] ==== | ==== [[Arthur's Baby]] ==== | ||
<gallery> | <gallery position="center" spacing="small"> | ||
S01E11a.jpg | S01E11a.jpg | ||
</gallery> | </gallery> | ||
==== [[Arthur's Lost Dog]] ==== | ==== [[Arthur's Lost Dog]] ==== | ||
<gallery> | <gallery position="center" spacing="small"> | ||
S01E12b Rattles and Molly.jpg | S01E12b Rattles and Molly.jpg | ||
</gallery> | </gallery> | ||
==== [[Meek for a Week]] ==== | ==== [[Meek for a Week]] ==== | ||
<gallery> | <gallery position="center" spacing="small"> | ||
Meek for a Week 18.jpg | Meek for a Week 18.jpg | ||
Meek for a Week 20.jpg | Meek for a Week 20.jpg | ||
| Line 75: | Line 75: | ||
==== [[Arthur, World's Greatest Gleeper]] ==== | ==== [[Arthur, World's Greatest Gleeper]] ==== | ||
<gallery> | <gallery position="center" spacing="small"> | ||
Arthur, World's Greatest Gleeper 1.jpg | Arthur, World's Greatest Gleeper 1.jpg | ||
Arthur, World's Greatest Gleeper 4.jpg | Arthur, World's Greatest Gleeper 4.jpg | ||
| Line 98: | Line 98: | ||
Arthur, World's Greatest Gleeper 59.jpg | Arthur, World's Greatest Gleeper 59.jpg | ||
Arthur, World's Greatest Gleeper 62.jpg | Arthur, World's Greatest Gleeper 62.jpg | ||
</gallery> | </gallery> | ||
==== [[Sue Ellen Moves In]] ==== | ==== [[Sue Ellen Moves In]] ==== | ||
<gallery> | <gallery position="center" spacing="small"> | ||
Phone Calls.JPG | Phone Calls.JPG | ||
</gallery> | </gallery> | ||
==== [[Bully for Binky]] ==== | ==== [[Bully for Binky]] ==== | ||
<gallery> | <gallery position="center" spacing="small"> | ||
Bully for Binky 48.jpg | Bully for Binky 48.jpg | ||
Bully for Binky 49.jpg | Bully for Binky 49.jpg | ||
| Line 126: | Line 125: | ||
==== [[Arthur Cleans Up]] ==== | ==== [[Arthur Cleans Up]] ==== | ||
<gallery> | <gallery position="center" spacing="small"> | ||
Arthur Cleans Up 8.jpg | Arthur Cleans Up 8.jpg | ||
Arthur Cleans Up 9.jpg | Arthur Cleans Up 9.jpg | ||
| Line 163: | Line 162: | ||
==== [[The Scare-Your-Pants-Off Club]] ==== | ==== [[The Scare-Your-Pants-Off Club]] ==== | ||
<gallery> | <gallery position="center" spacing="small"> | ||
S01E28b1.jpg | S01E28b1.jpg | ||
</gallery> | </gallery> | ||
==== [[My Club Rules]] ==== | ==== [[My Club Rules]] ==== | ||
<gallery> | <gallery position="center" spacing="small"> | ||
Kiefer 00001, with Sue Ellen, Molly, and Rattles.png | Kiefer 00001, with Sue Ellen, Molly, and Rattles.png | ||
</gallery> | </gallery> | ||
| Line 175: | Line 174: | ||
==== [[Arthur Meets Mister Rogers]] ==== | ==== [[Arthur Meets Mister Rogers]] ==== | ||
<gallery> | <gallery position="center" spacing="small"> | ||
S02E01 Tough Customers.jpg | S02E01 Tough Customers.jpg | ||
</gallery> | </gallery> | ||
==== [[Sue Ellen's Lost Diary]] ==== | ==== [[Sue Ellen's Lost Diary]] ==== | ||
<gallery> | <gallery position="center" spacing="small"> | ||
Sue Ellen's Lost Diary - Tough Customers.jpg | Sue Ellen's Lost Diary - Tough Customers.jpg | ||
</gallery> | </gallery> | ||
==== [[Arthur the Loser]] ==== | ==== [[Arthur the Loser]] ==== | ||
<gallery> | <gallery position="center" spacing="small"> | ||
Rattles Cat 2.jpg | Rattles Cat 2.jpg | ||
</gallery> | </gallery> | ||
==== [[D.W.'s Very Bad Mood]] ==== | ==== [[D.W.'s Very Bad Mood]] ==== | ||
<gallery> | <gallery position="center" spacing="small"> | ||
S02E18b Molly.png | S02E18b Molly.png | ||
</gallery> | </gallery> | ||
==== [[How the Cookie Crumbles]] ==== | ==== [[How the Cookie Crumbles]] ==== | ||
<gallery> | <gallery position="center" spacing="small"> | ||
How the Cookie Crumbles - Previous year.jpg | How the Cookie Crumbles - Previous year.jpg | ||
</gallery> | </gallery> | ||
| Line 202: | Line 201: | ||
==== [[The Chips are Down]] ==== | ==== [[The Chips are Down]] ==== | ||
<gallery> | <gallery position="center" spacing="small"> | ||
The Chips are Down - Tough Customers 1.jpg | The Chips are Down - Tough Customers 1.jpg | ||
The Chips are Down - Tough Customers 2.jpg | The Chips are Down - Tough Customers 2.jpg | ||
| Line 210: | Line 209: | ||
==== [[Revenge of the Chip]] ==== | ==== [[Revenge of the Chip]] ==== | ||
<gallery> | <gallery position="center" spacing="small"> | ||
Tough customers.png | Tough customers.png | ||
</gallery> | </gallery> | ||
==== [[Meet Binky]] ==== | ==== [[Meet Binky]] ==== | ||
<gallery> | <gallery position="center" spacing="small"> | ||
Meet Binky 061.PNG | Meet Binky 061.PNG | ||
</gallery> | </gallery> | ||
==== [[Dad's Dessert Dilemma]] ==== | ==== [[Dad's Dessert Dilemma]] ==== | ||
<gallery> | <gallery position="center" spacing="small"> | ||
DDD 97.jpg | DDD 97.jpg | ||
</gallery> | </gallery> | ||
==== [[Popular Girls]] ==== | ==== [[Popular Girls]] ==== | ||
<gallery> | <gallery position="center" spacing="small"> | ||
Popular Girls 9.jpg | Popular Girls 9.jpg | ||
Popular Girls 10.jpg | Popular Girls 10.jpg | ||
| Line 238: | Line 237: | ||
==== [[Arthur's Almost Live Not Real Music Festival]] ==== | ==== [[Arthur's Almost Live Not Real Music Festival]] ==== | ||
<gallery> | <gallery position="center" spacing="small"> | ||
Allofthem.jpg | Allofthem.jpg | ||
</gallery> | </gallery> | ||
| Line 245: | Line 244: | ||
==== [[Arthur's Big Hit]] ==== | ==== [[Arthur's Big Hit]] ==== | ||
<gallery> | <gallery position="center" spacing="small"> | ||
ABH 68.JPG | ABH 68.JPG | ||
ABH 70.JPG | ABH 70.JPG | ||
| Line 267: | Line 266: | ||
==== [[The Rat Who Came to Dinner]] ==== | ==== [[The Rat Who Came to Dinner]] ==== | ||
<gallery> | <gallery position="center" spacing="small"> | ||
The Rat Who Came to Dinner - Cafeteria.jpg | The Rat Who Came to Dinner - Cafeteria.jpg | ||
</gallery> | </gallery> | ||
| Line 274: | Line 273: | ||
==== [[Pet Peeved]] ==== | ==== [[Pet Peeved]] ==== | ||
<gallery> | <gallery position="center" spacing="small"> | ||
Pet Peeved 15.jpg | Pet Peeved 15.jpg | ||
Pet Peeved 18.jpg | Pet Peeved 18.jpg | ||
| Line 290: | Line 289: | ||
==== [[Brother, Can You Spare a Clarinet?]] ==== | ==== [[Brother, Can You Spare a Clarinet?]] ==== | ||
<gallery> | <gallery position="center" spacing="small"> | ||
Brother, Can You Spare a Clarinet 42.png | Brother, Can You Spare a Clarinet 42.png | ||
Brother, Can You Spare a Clarinet 44.png | Brother, Can You Spare a Clarinet 44.png | ||
| Line 315: | Line 314: | ||
==== [[The Boy with His Head in the Clouds]] ==== | ==== [[The Boy with His Head in the Clouds]] ==== | ||
<gallery> | <gallery position="center" spacing="small"> | ||
S06E07a Tough Customers.jpg | S06E07a Tough Customers.jpg | ||
S06E07a Tough Customers2.jpg | S06E07a Tough Customers2.jpg | ||
| Line 321: | Line 320: | ||
==== [[The Good Sport]] ==== | ==== [[The Good Sport]] ==== | ||
<gallery> | <gallery position="center" spacing="small"> | ||
S06E09a.png | S06E09a.png | ||
</gallery> | </gallery> | ||
| Line 328: | Line 327: | ||
==== [[Buster's Amish Mismatch]] ==== | ==== [[Buster's Amish Mismatch]] ==== | ||
<gallery> | <gallery position="center" spacing="small"> | ||
Buster's Amish Mismatch - MacGrady.png | Buster's Amish Mismatch - MacGrady.png | ||
</gallery> | </gallery> | ||
==== [[Prunella Sees the Light]] ==== | ==== [[Prunella Sees the Light]] ==== | ||
<gallery> | <gallery position="center" spacing="small"> | ||
Tough customers watch henry skreever in prunella sees the light.jpg | Tough customers watch henry skreever in prunella sees the light.jpg | ||
</gallery> | </gallery> | ||
| Line 340: | Line 339: | ||
==== [[D.W., Dancing Queen]] ==== | ==== [[D.W., Dancing Queen]] ==== | ||
<gallery> | <gallery position="center" spacing="small"> | ||
D.W.'s Joke 1.JPG | D.W.'s Joke 1.JPG | ||
D.W.'s Joke 2.JPG | D.W.'s Joke 2.JPG | ||
| Line 370: | Line 369: | ||
====<nowiki/>==== | ====<nowiki/>==== | ||
<gallery> | <gallery position="center" spacing="small"> | ||
</gallery> | </gallery> | ||
| Line 377: | Line 375: | ||
==== [[The Law of the Jungle Gym]] ==== | ==== [[The Law of the Jungle Gym]] ==== | ||
<gallery> | <gallery position="center" spacing="small"> | ||
The Law of the Jungle Gym 1.jpg | The Law of the Jungle Gym 1.jpg | ||
The Law of the Jungle Gym 5.jpg | The Law of the Jungle Gym 5.jpg | ||
| Line 456: | Line 454: | ||
==== [[Arthur Makes Waves]] ==== | ==== [[Arthur Makes Waves]] ==== | ||
<gallery> | <gallery position="center" spacing="small"> | ||
Toughcustomerscaveman.png | Toughcustomerscaveman.png | ||
MacDonalds Pool.JPG | MacDonalds Pool.JPG | ||
| Line 465: | Line 463: | ||
==== [[The Agent of Change]] ==== | ==== [[The Agent of Change]] ==== | ||
<gallery> | <gallery position="center" spacing="small"> | ||
The Agent of Change 13.jpg | The Agent of Change 13.jpg | ||
The Agent of Change 14.jpg | The Agent of Change 14.jpg | ||
| Line 507: | Line 505: | ||
==== [[Arthur Unravels]] ==== | ==== [[Arthur Unravels]] ==== | ||
<gallery> | <gallery position="center" spacing="small"> | ||
S14E08a1.jpg | S14E08a1.jpg | ||
</gallery> | </gallery> | ||
| Line 514: | Line 512: | ||
==== [[I Wanna Hold Your Hand]] ==== | ==== [[I Wanna Hold Your Hand]] ==== | ||
<gallery> | <gallery position="center" spacing="small"> | ||
Screen Shot 2015-01-01 at 12.52.20 PM.png | Screen Shot 2015-01-01 at 12.52.20 PM.png | ||
Rattles shed a tear.jpg | Rattles shed a tear.jpg | ||
| Line 524: | Line 522: | ||
==== [[Buster's Secret Admirer]] ==== | ==== [[Buster's Secret Admirer]] ==== | ||
<gallery> | <gallery position="center" spacing="small"> | ||
Buster's Secret Admirer - Molly1.png | Buster's Secret Admirer - Molly1.png | ||
Buster's Secret Admirer - Molly2.png | Buster's Secret Admirer - Molly2.png | ||
| Line 533: | Line 531: | ||
==== [[Based on a True Story]] ==== | ==== [[Based on a True Story]] ==== | ||
<gallery> | <gallery position="center" spacing="small"> | ||
Landonna Compson 2.png | Landonna Compson 2.png | ||
</gallery> | </gallery> | ||
==== [[The Last Tough Customer]] ==== | ==== [[The Last Tough Customer]] ==== | ||
<gallery> | <gallery position="center" spacing="small"> | ||
Molly2.png | Molly2.png | ||
Molly3.png|Molly letting her hair down for the first time | Molly3.png|Molly letting her hair down for the first time | ||
| Line 570: | Line 568: | ||
==== [[Brain's Biggest Blunder]] ==== | ==== [[Brain's Biggest Blunder]] ==== | ||
<gallery> | <gallery position="center" spacing="small"> | ||
Audience (Brain's Biggest Blunder).png | Audience (Brain's Biggest Blunder).png | ||
Arithmattack.jpg | Arithmattack.jpg | ||
| Line 578: | Line 576: | ||
==== [[Whip. Mix. Blend.]] ==== | ==== [[Whip. Mix. Blend.]] ==== | ||
<gallery> | <gallery position="center" spacing="small"> | ||
Whip, Mix, Blend by WABF5050 045.png | Whip, Mix, Blend by WABF5050 045.png | ||
Whip, Mix, Blend by WABF5050 046.png | Whip, Mix, Blend by WABF5050 046.png | ||
| Line 600: | Line 598: | ||
Whip, Mix, Blend by WABF5050 167.png | Whip, Mix, Blend by WABF5050 167.png | ||
Whip, Mix, Blend by WABF5050 169.png | Whip, Mix, Blend by WABF5050 169.png | ||
</gallery> | </gallery> | ||
| Line 606: | Line 603: | ||
==== [[Carl's Concerto]] ==== | ==== [[Carl's Concerto]] ==== | ||
<gallery> | <gallery position="center" spacing="small"> | ||
Carl'sConcerto4.jpg | Carl'sConcerto4.jpg | ||
Carl'sConcerto24.jpg | Carl'sConcerto24.jpg | ||
| Line 615: | Line 612: | ||
==== [[Buster's Second Chance]] ==== | ==== [[Buster's Second Chance]] ==== | ||
<gallery> | <gallery position="center" spacing="small"> | ||
Buster's Second Chance 190.png | Buster's Second Chance 190.png | ||
Buster's Second Chance 191.png | Buster's Second Chance 191.png | ||
Revision as of 09:16, 3 December 2016
| This is the Molly MacDonald/Gallery page |
| Place images in galleries in appropriate sections. Do not post fan art here. DO NOT make unnecessary headers, for example put a Screenshot header when there's nothing but screenshots.
See also: |
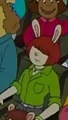
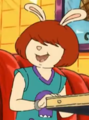
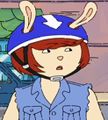
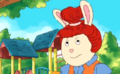
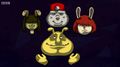
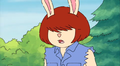
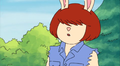
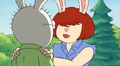
Promotional Image

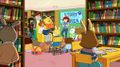
From Books
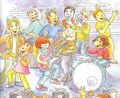
Molly in the concert in Arthur, It's Only Rock 'n' Roll

Character Modelsheet and Storyboard

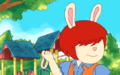
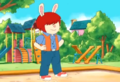
Screenshots
Alternate Apparel
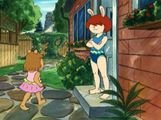
Molly in her street hockey outfit.
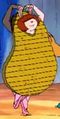
Molly as a potato chip in "Revenge of the Chip".
Molly in a black shirt with a red collar and jeans, in "Don't Ask Muffy"
Molly in a green shirt, wearing a necklace, in "Don't Ask Muffy"
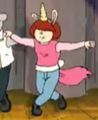
Molly in "D.W., Dancing Queen".

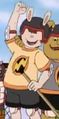
Molly as a cavewoman.
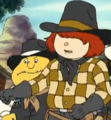
Molly as a cowgirl.

Molly in a '50s outfit.
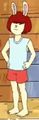
Molly in her swimsuit
Molly in a summer outfit.
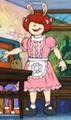
Molly in a dress.
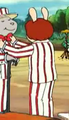
Molly in barbershop quartet clothes, in "D.W. Beats All"
Molly's clothes in "D.W. Swims with the Fishes".
Molly's eyes as shown in "The Agent of Change".
Her top in "The Agent of Change".
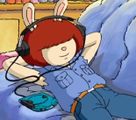
Listening music with headphones in "The Last King of Lambland".
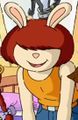
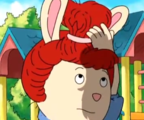
Molly wearing winter clothes in "Based on a True Story."
Molly as a Kindergartner.
Molly when she was young and put her hair up in a bun.
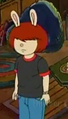
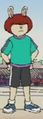
Molly in gym clothes
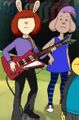
Molly as a teenage rockstar.


Season 1
D.W. All Wet

Arthur Accused!


Arthur Goes to Camp


Arthur's Baby

Arthur's Lost Dog

Meek for a Week


Arthur, World's Greatest Gleeper


Sue Ellen Moves In

Bully for Binky


Arthur Cleans Up


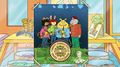
The Scare-Your-Pants-Off Club

My Club Rules

Season 2
Arthur Meets Mister Rogers

Sue Ellen's Lost Diary

Arthur the Loser

D.W.'s Very Bad Mood

How the Cookie Crumbles

Season 3
The Chips are Down


Revenge of the Chip

Meet Binky

Dad's Dessert Dilemma

Popular Girls


Arthur's Almost Live Not Real Music Festival

Season 4
Arthur's Big Hit


The Rat Who Came to Dinner

Season 5
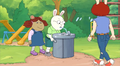
Pet Peeved


Season 6
Brother, Can You Spare a Clarinet?


The Boy with His Head in the Clouds

The Good Sport

Season 7
Buster's Amish Mismatch

Prunella Sees the Light

Season 8
D.W., Dancing Queen


Season 9
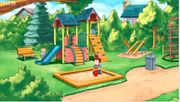
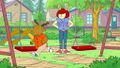
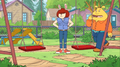
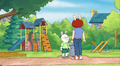
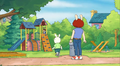
The Law of the Jungle Gym


Arthur Makes Waves


Season 14
The Agent of Change


Arthur Unravels

Season 15
I Wanna Hold Your Hand


Buster's Secret Admirer


Season 16
Based on a True Story

The Last Tough Customer
Molly letting her hair down for the first time
- Molly MacDonald.jpg
- The Last Tough Customer.png
- The Last Tough Customer- Molly Trying to Apologize to Amanda1.PNG
- The Last Tough Customer- Molly Trying to Apologize to Amanda2.PNG
- The Last Tough Customer- Molly after listening to James' Question.PNG


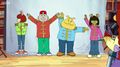
Brain's Biggest Blunder
.png)

Season 18
Whip. Mix. Blend.


Season 19
Carl's Concerto


Season 20
Buster's Second Chance


| ||||||||||||||