The forum pages are fully operational! See this link for the latest forum topics, where users can collaborate or discuss certain topics in one place!
Difference between revisions of "The Buster Report/Gallery"
From Arthur Wiki
Jump to navigationJump to search
(→Screenshots: replaced: Category:A to Z → Category:A to Z{{TitleSort}}) |
|||
| (13 intermediate revisions by 6 users not shown) | |||
| Line 1: | Line 1: | ||
<gallery | {{GalleryHeader}} | ||
==Screenshots== | |||
<gallery position="center" spacing="small"> | |||
The Buster Report 1.jpg | The Buster Report 1.jpg | ||
The Buster Report 2.jpg | The Buster Report 2.jpg | ||
| Line 14: | Line 16: | ||
The Buster Report 13.jpg | The Buster Report 13.jpg | ||
The Buster Report 14.jpg | The Buster Report 14.jpg | ||
The Buster Report 16.jpg | The Buster Report 16.jpg | ||
The Buster Report 17.jpg | The Buster Report 17.jpg | ||
| Line 80: | Line 81: | ||
The Buster Report 79.jpg | The Buster Report 79.jpg | ||
The Buster Report 80.jpg | The Buster Report 80.jpg | ||
The Buster Report 81.jpg | |||
The Buster Report 82.jpg | |||
The Buster Report 83.jpg | |||
The Buster Report 84.jpg | |||
The Buster Report 85.jpg | |||
The Buster Report 86.jpg | |||
The Buster Report 87.jpg | |||
The Buster Report 88.jpg | |||
The Buster Report 89.jpg | |||
The Buster Report 90.jpg | |||
The Buster Report 91.jpg | |||
The Buster Report 92.jpg | |||
The Buster Report 93.jpg | |||
The Buster Report 94.jpg | |||
The Buster Report 95.jpg | |||
The Buster Report 96.jpg | |||
The Buster Report 97.jpg | |||
The Buster Report 98.jpg | |||
The Buster Report 99.jpg | |||
The Buster Report 100.jpg | |||
The Buster Report 101.jpg | |||
The Buster Report 102.jpg | |||
The Buster Report 103.jpg | |||
The Buster Report 104.jpg | |||
The Buster Report 105.jpg | |||
The Buster Report 106.jpg | |||
The Buster Report 107.jpg | |||
The Buster Report 108.jpg | |||
The Buster Report 109.jpg | |||
The Buster Report 110.jpg | |||
The Buster Report 111.jpg | |||
The Buster Report 112.jpg | |||
The Buster Report 113.jpg | |||
The Buster Report 114.jpg | |||
The Buster Report 115.jpg | |||
The Buster Report 116.jpg | |||
The Buster Report 117.jpg | |||
The Buster Report 118.jpg | |||
The Buster Report 119.jpg | |||
The Buster Report 120.jpg | |||
The Buster Report 121.jpg | |||
The Buster Report 122.jpg | |||
The Buster Report 123.jpg | |||
The Buster Report 124.jpg | |||
The Buster Report 125.jpg | |||
The Buster Report 126.jpg | |||
The Buster Report 127.jpg | |||
The Buster Report 128.jpg | |||
The Buster Report 129.jpg | |||
The Buster Report 130.jpg | |||
The Buster Report 131.jpg | |||
The Buster Report 132.jpg | |||
The Buster Report 133.jpg | |||
The Buster Report 134.jpg | |||
S14E01b Title Card.jpg|1401b Title Card | |||
</gallery> | </gallery> | ||
[[Category:Episode | [[Category:Episode galleries]] | ||
[[Category:A to Z]]{{TitleSort}} | |||
Latest revision as of 00:28, 16 February 2018
| This is the The Buster Report/Gallery page |
| Place images in galleries in appropriate sections. Do not post fan art here. DO NOT make unnecessary headers, for example put a Screenshot header when there's nothing but screenshots.
See also: |
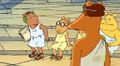
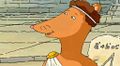
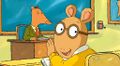
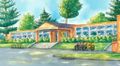
Screenshots[edit]


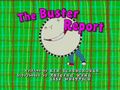
1401b Title Card


